.Net Integration with QuickBooks DeskTop
Introduction:
QuickBooks is an accounting software developed by Intuit. It is offered in Online and Desktop editions. If you are a .NET developer and you have got an assignment to integrate a .NET application with QuickBooks desktop then this step-by-step demo guide will be a handy resource for you. Intuit has provided a QBFC library so that .NET third-party applications can access or write QuickBooks desktop data. I did not find any article at the time of writing this blog that covers the integration of Customers, Vendors, Line Items, Invoices, Bills, Purchase Orders, Invoice payments, bill payments, etc. In this blog, we will discuss each integration module in detail plus a working demo application with complete source code is also attached.
Getting Started:
Let’s start by understanding the prerequisites:
- Install QuickBooks Desktop.
- Install Quick Books SDK, available here (http://developer.intuit.com/) search for Download the QBSDK 7.0 or latest.
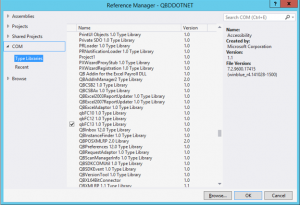
- Reference to QBFC. (If you are creating a new application)
Demo Application:
If you have not downloaded the demo application, download it and open the solution in Visual Studio. This demo application was created in Visual Studio 2015. After opening the solution, open the App.config file, find app settings node and provide a path to your QuickBooks company file.
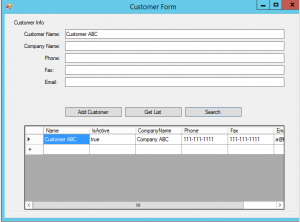
Customer Form:
- Open QuickBooks Desktop and Run the demo application.
- If there are no errors, you will be seeing a Customer Form.

- Fill in the information and click Add Customer.
- On the first run, a dialog inside QuickBooks will be displayed as shown below.
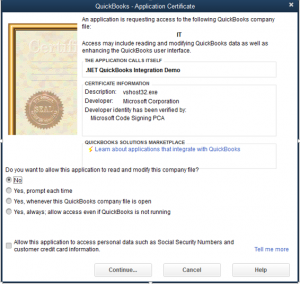
In the figure above, you can see that the currently open file is called IT. Here, we may or may not allow the application to have access to the company file. We can also specify whether to prompt us every time the application tries to access the company file or always allow the application to access the company file whether QuickBooks is running or not. Select option # 4 and click continue.
- If you have provided all the information in the Customer Form, then a success message will be displayed.
- To verify, click Get List button and the newly created Customer will be displayed in the grid view.
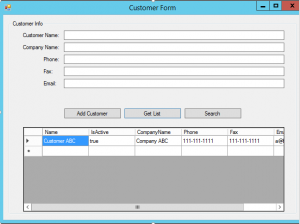
3. If you would like to search a specific customer, type in the Customer name and click the search button. If the customer exists in QuickBooks, the information will be displayed in the grid view.
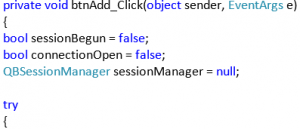
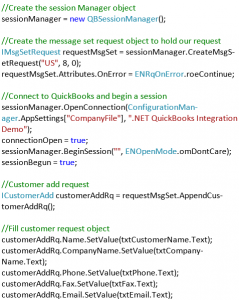
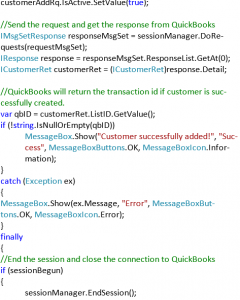
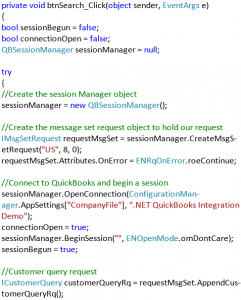
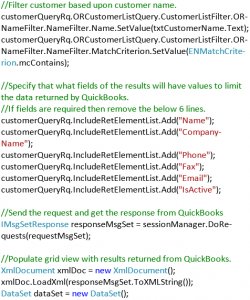
Customer Form Code:
Add Customer:
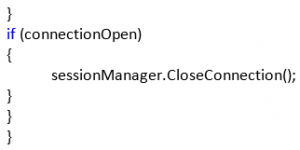
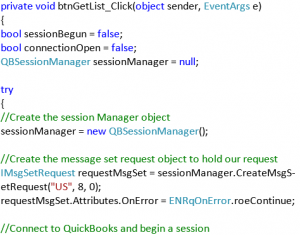
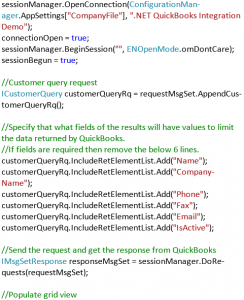
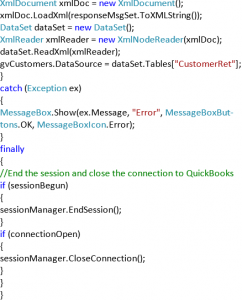
Get Customer List:
Search Customer:

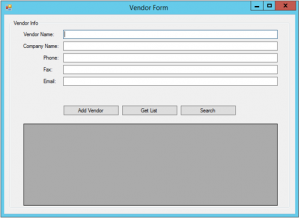
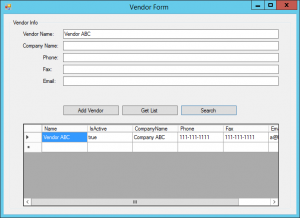
Vendor Form:
- Stop application if it’s already running.
- Open Program.cs file and modify the line to open Vendor Form upon startup.
- Run the application, if there are no errors, you will be seeing a Vendor Form.
4. Fill in the information and click Add Vendor.
5. If you have provided all the information in the Vendor Form, then a success message will be displayed.
6. To verify, click Get List button and the newly created Vendor will be displayed in the grid view.
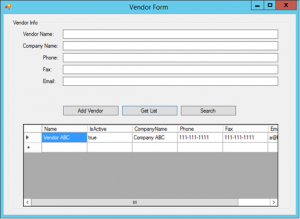
7. If you would like to search for a specific vendor, type in the Vendor name and click the search button. If the vendor exists in QuickBooks, the information will be displayed in the grid view.
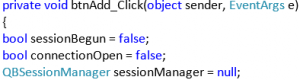
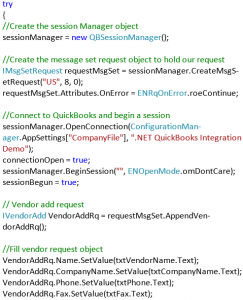
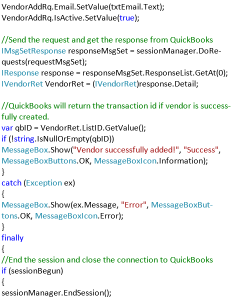
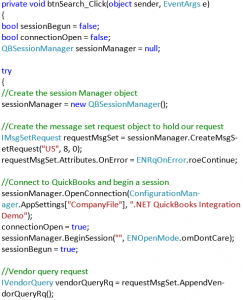
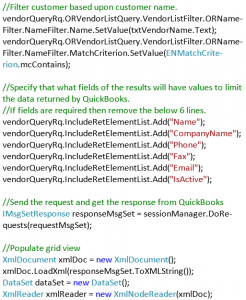
Vendor Form Code:
Add Vendor:
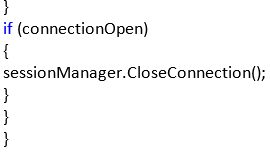
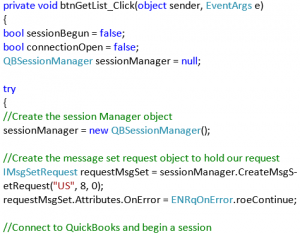
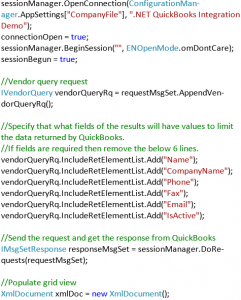
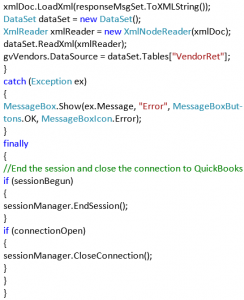
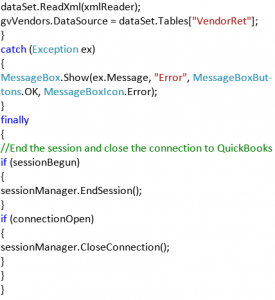
Get Vendor List:
Search Vendor:
Invoice Form:
- Stop application if it’s already running.
- Open Program.cs file and modify the line to open the Invoice Form upon startup.
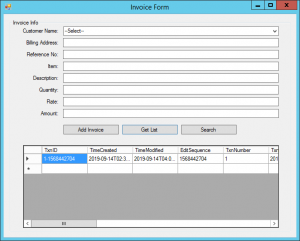
- Run the application, if there are no errors, you will be seeing an Invoice Form.
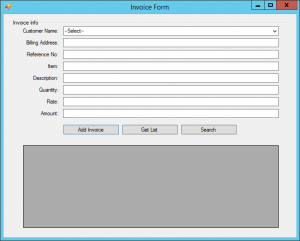
4. Fill in the information and click Add Invoice.
5. If you have provided all the information in the Invoice Form, then a success message will be displayed.
6. To verify, click Get List button and the newly created Invoice will be displayed in the grid view.
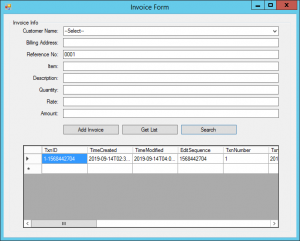
7. If you would like to search a specific Invoice, type in the Reference # and click the search button. If Invoice exists in QuickBooks, the information will be displayed in the grid view.
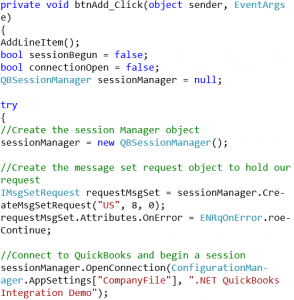
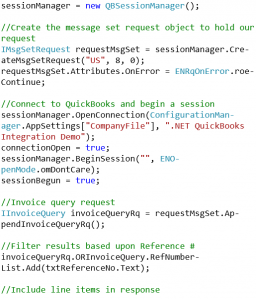
Invoice Form Code:
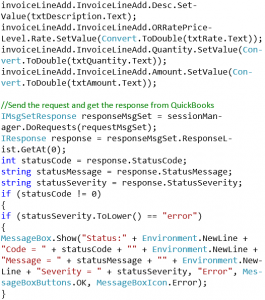
Add Invoice:


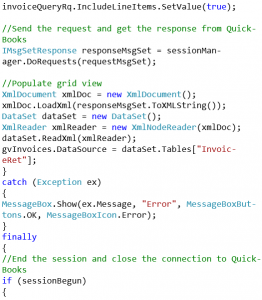
Get Invoice List:
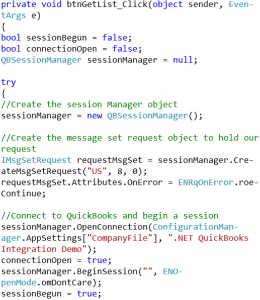
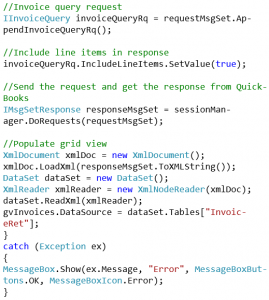
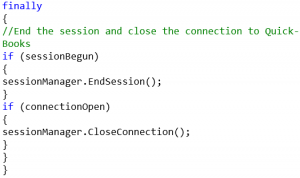
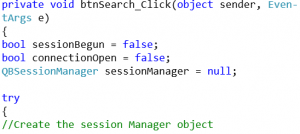
Search Invoice:
Bill Form:
- Stop application if it’s already running.
- Open Program.cs file and modify the line to open Bill Form upon startup.
- Run the application, if there are no errors, you will be seeing a Bill Form.
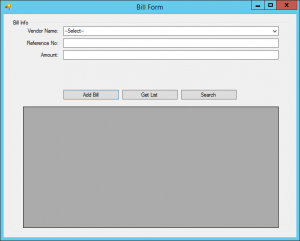
4. Fill in the information and click Add Bill.
5. If you have provided all the information in the Bill Form, then a success message will be displayed.
6. To verify, click Get List button and the newly created Bill will be displayed in the grid view.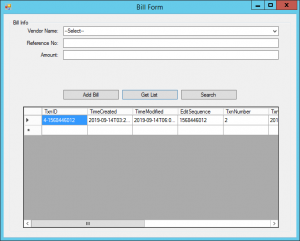
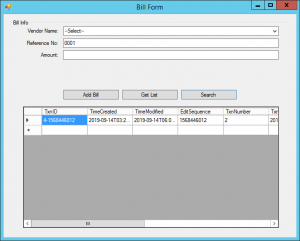
7. If you would like to search for a specific Bill, type in the Reference # and click the search button. If Bill exists in QuickBooks, the information will be displayed in the grid view.
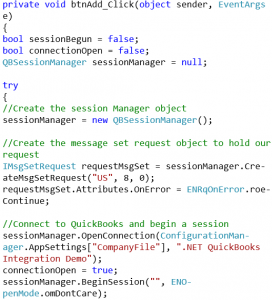
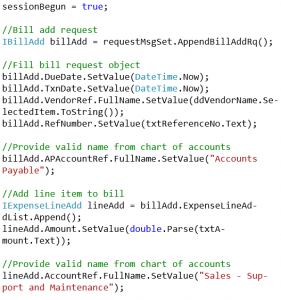
Bill Form Code:
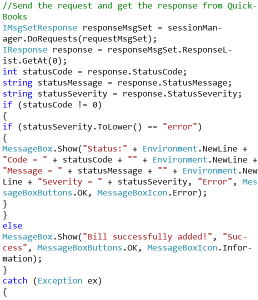
Add Bill:

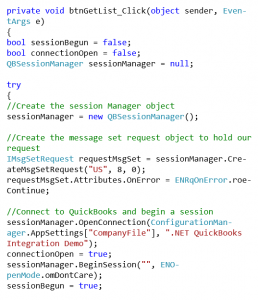
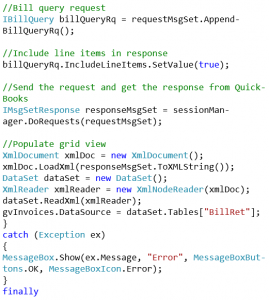
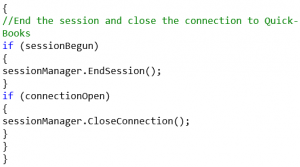
Get Bill List:
Search Bill:
Purchase Order Form:
- Stop application if it’s already running.
- Open Program.cs file and modify the line to open PO Form upon startup.
- Run the application, if there are no errors, you will be seeing a PO Form.
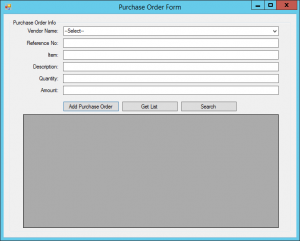
- Fill in the information and click Add Purchase Order.
- If you have provided all the information in the Purchase Order Form, then a success message will be displayed.
- To verify, click Get List button and the newly created Purchase Order will be displayed in the grid view.
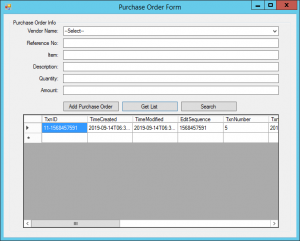
7. If you would like to search a specific Purchase Order, type in the Reference # and click the search button. If Purchase Order exists in QuickBooks, the information will be displayed in the grid view.

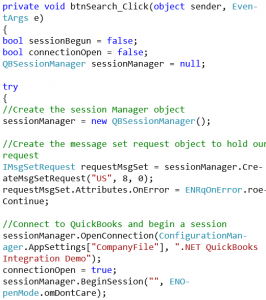
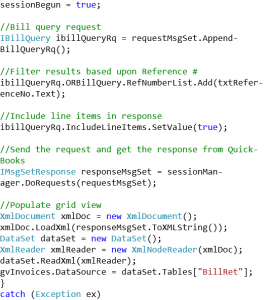
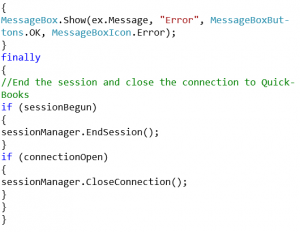
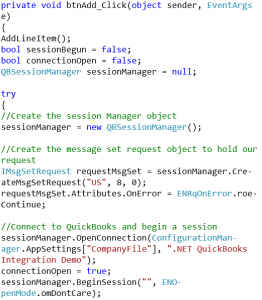
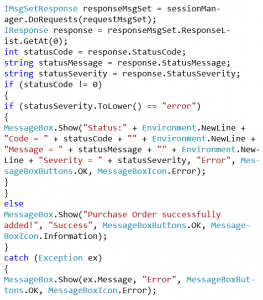
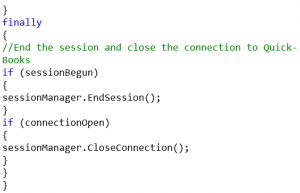
Purchase Order Form Code:
Add purchase Order:

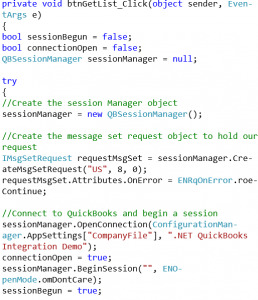
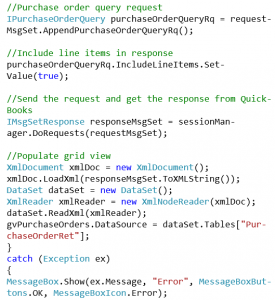
Get Purchase Order List:

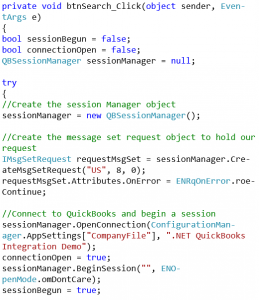
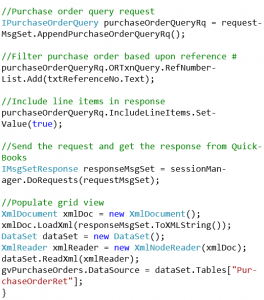
Search Purchase Order:
Invoice Payment Form:
- Stop application if it’s already running.
- Open Program.cs file and modify the line to open the Invoice Payment Form upon startup.
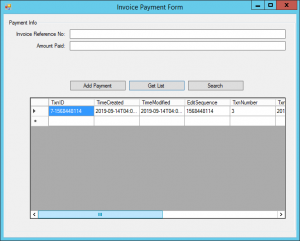
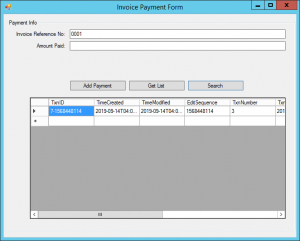
- Run the application, if there are no errors, you will be seeing an Invoice Payment Form.

3. Fill in the information and click Add Payment.
4. If you have provided all the information in the Payment Form, then a success message will be displayed.
5. To verify, click Get List button and the newly created Payment for Invoice will be displayed yed in the grid view.
7. If you would like to search Payment for a specific Invoice, type in the Reference # and click the search button. If Payment exists in QuickBooks, the information will be displayed in the grid view.
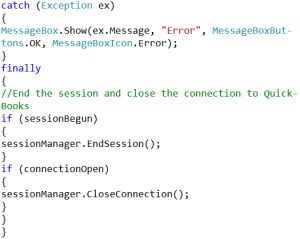
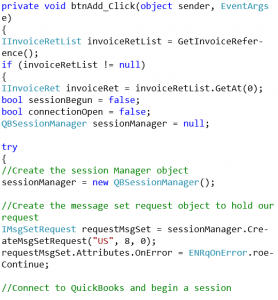
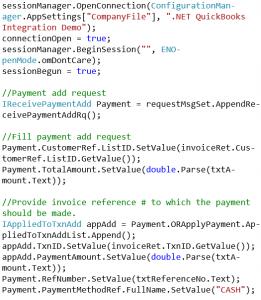
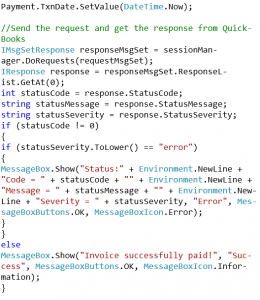
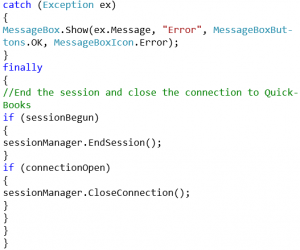
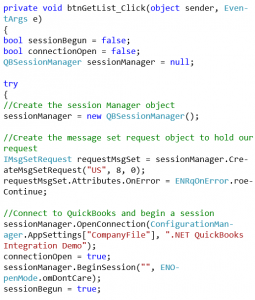
Invoice Payment Form Code:
Add Payment:
Get Payment List:
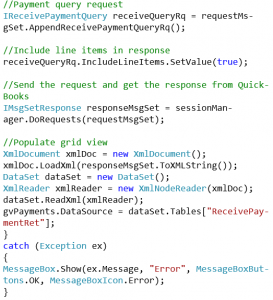
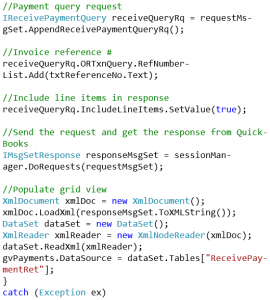
Search Payment:

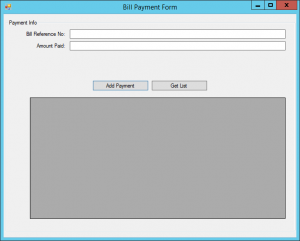
Bill Payment Form:
- Stop application if it’s already running.
- Open Program.cs file and modify the line to open Bill Payment Form upon startup.
- Run the application, if there are no errors, you will be seeing a Bill Payment Form.
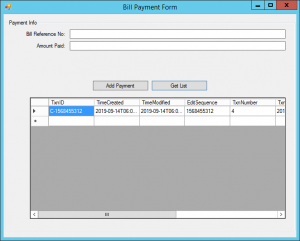
4. Fill in the information and click Add Payment.
6. If you have provided all the information in the Payment Form, then a success message will be displayed.
7. To verify, click Get List button and the newly created Payment will be displayed in the grid view.
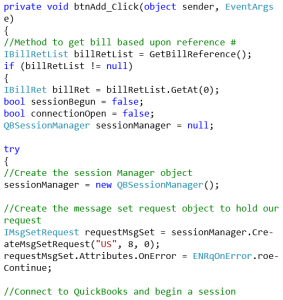
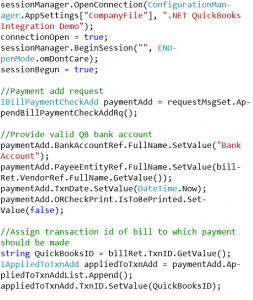
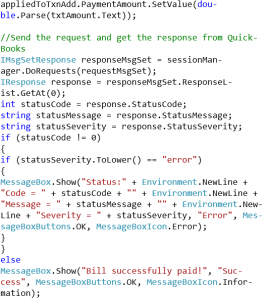
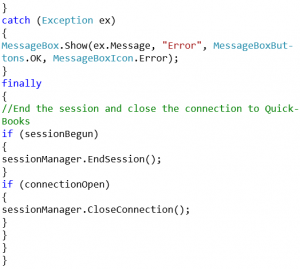
Bill Payment Form Code:
Add Bill Payment:
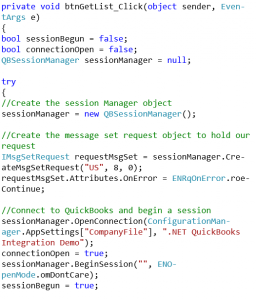
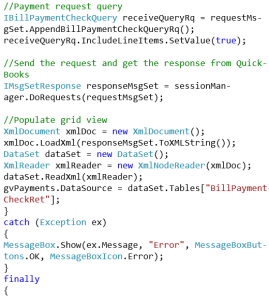
Get Bill Payment List:
Conclusion:
The Visual Studio 2015 solution of the demo application can be downloaded here.
Related Posts
 BizTalk Migration to Azure iPaaS- Why Should You Care?
 Aptos Integration
 Salesforce Integration using Microsoft BizTalk Server
 Salesforce Integration Using SOAPUI To Test Calls
 Azure Logic Apps: 10 frequently used integration patterns in Logic Apps
- Azure Logic Apps: Top 5 use cases and the road ahead of Microsoft integration